Hyundai added the Brembo brakes from 2009 to 2016 in the R-Spec & Track trim level Hyundai Genesis Coupes.
| BRAKES | |
|---|---|
| Brake Type | Non Brembo Base Model Single Piston |
| Brake ABS System | 4-Wheel - 4 channel |
| Brake ABS System (Second Line) | N/A |
| Disc - Front (Yes or ) | Yes |
| Disc - Rear (Yes or ) | Yes |
| Front Brake Rotor Diam x Thickness | 12.6 in |
| Rear Brake Rotor Diam x Thickness | 12.4 in |
| BRAKES | |
|---|---|
| Brake Type | Brembo Calipers 4 piston |
| Brake ABS System | 4-Wheel |
| Brake ABS System (Second Line) | N/A |
| Disc - Front (Yes or ) | Yes |
| Disc - Rear (Yes or ) | Yes |
| Front Brake Rotor Diam x Thickness | 13.4 in |
| Rear Brake Rotor Diam x Thickness | 13.0 in |
ABS System utilizes the following input channels:
Wheel Speed Sensors, Steering Angle, Yaw/G Sensor, Brake Pressure (built in ABS module)
Master cylinder is a dual cylinder that has a primary and secondary output that supplies one front and one opposite rear wheel.
Rear proportioning is done electronically within the ABS module to allow optimal stopping power to the rear axle.
Service Information:
Brake Bleeding:
Ensure brake fluid reservoir is at the MAX level line. Always use genuine DOT3/DOT4 brake fluid.
Brake Bleeding Sequence: Rear Right, Front Left, Rear Left, Front Right
Repeat this sequence until all air bubbles are removed from the system. Do not forgot to check brake fluid reservoir frequently during the process and refill to the MAX level line once complete.
Brembo equipped Hyundai Genesis Coupes have two brake bleeders per caliper. We like to start with the inside bleeder then move to the outside.
This process is critical and necessary after installing performance brake lines or brake calipers.
Brake Line Install:
After removing wheel & tire, remove the brake hose clip (A) where the hard line meets the rubber hose.
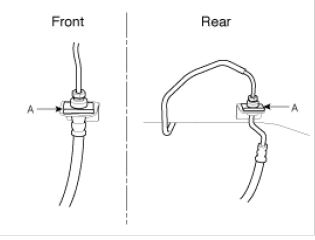
Disconnect the brake hard line tube by loosening the tube flare nut.
Disconnect the brake hose from the brake caliper.
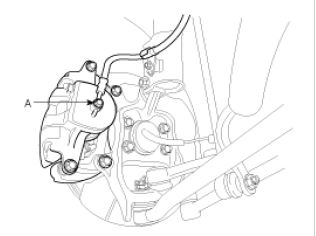
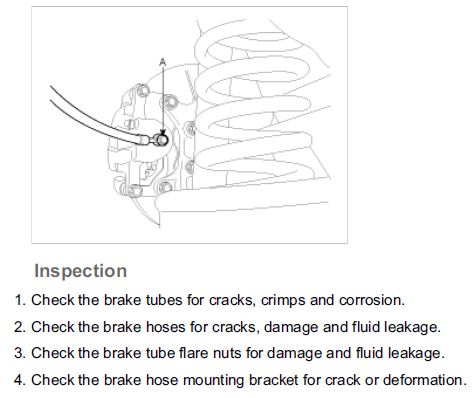
To install new brake line, tighten the brake line hose to the brake hard line tube flare nut to: 12.3 lb-ft. Then install the brake line to the caliper using new copper crush washers and tighten to 21.7 lb-ft.
Brake Pad Replacement:
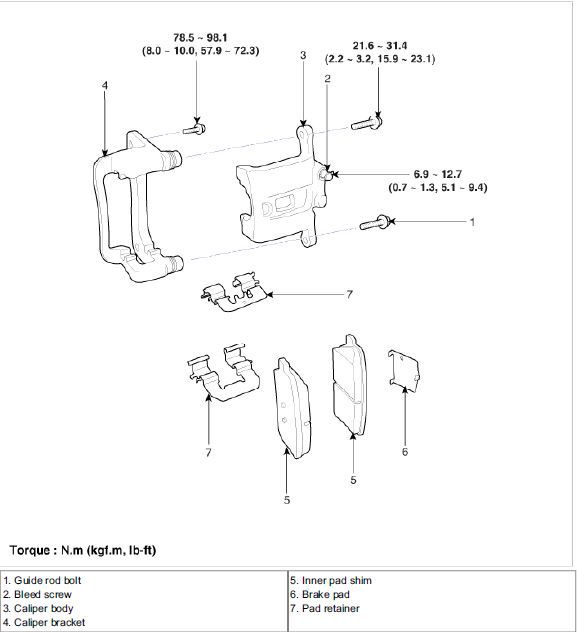
Standard Calipers (Non-Brembo):
Remove guide rod bolts which hold the caliper bracket to caliper body. Install new pads using provided shims.
May be necessary to compress the caliper piston using the old brake pad and a c-clamp if the caliper body does not slip onto the caliper body with the new brake pads there. Always open the brake fluid reservoir cap when doing this.
Tighten the guide rod bolts to: 23.1 lb-ft.
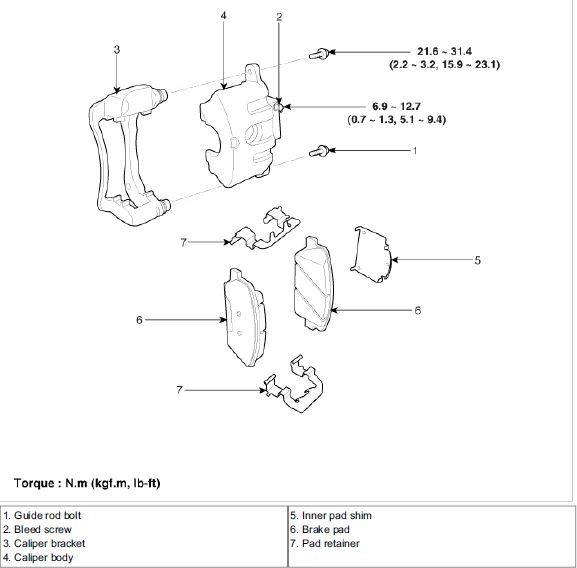
Same methodology is used for the rear standard brake pad replacement.
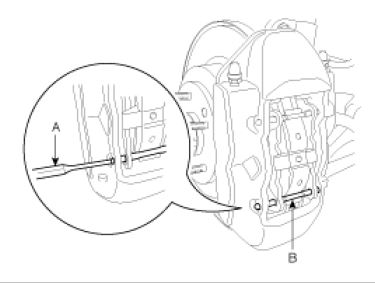
Brembo Calipers:
Remove the bottom guide pin (B) of the lower part with a pin punch (a small flat head will work).
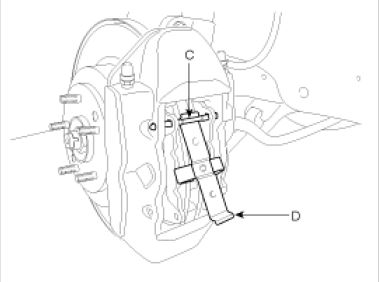
This will release tension from the retraction spring (D). Then remove the upper pin (C) to release the retraction spring (D).
Remove old brake pads (E).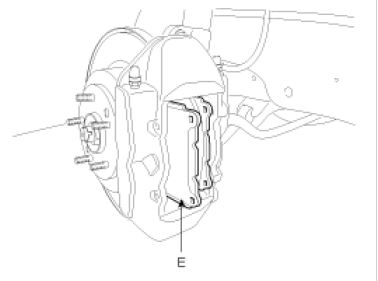
Installation of new brake pads is the reverse procedure. Insure the pins are pointing in the right direction and tap them into place (plastic hammer) making sure the locking inserts are popped into place. Make sure
Same methodology is used for the rear Brembo caliper brake pad replacement.
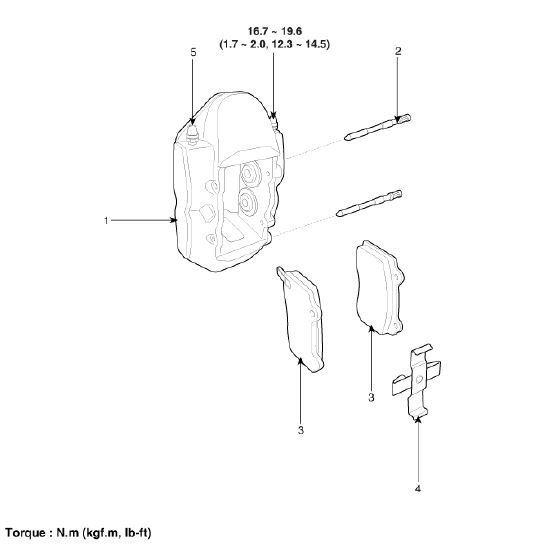
Caliper Removal and Installation:
Removal of the brake caliper is necessary for replacing the disc brake rotors for aftermarket rotors.
Standard Caliper: Caliper mounting bolts (assembly to knuckle) factory bolts (C) torque spec: 72.3 lb-ft
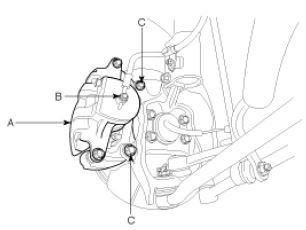
Same torque spec applies to the rear standard caliper factory bolts (C).
Brembo Caliper: Caliper mounting bolts (assembly to knuckle) factory bolts (C) torque spec: 75.9 lb-ft
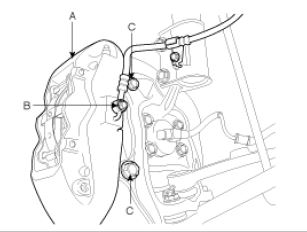
Same torque spec applies to the rear standard caliper factory bolts (C).
Front Brake Disc Thickness Check:
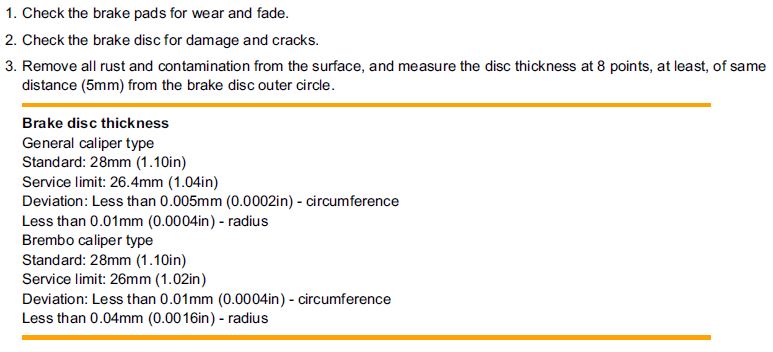
Rear Brake Disc Thickness Check:
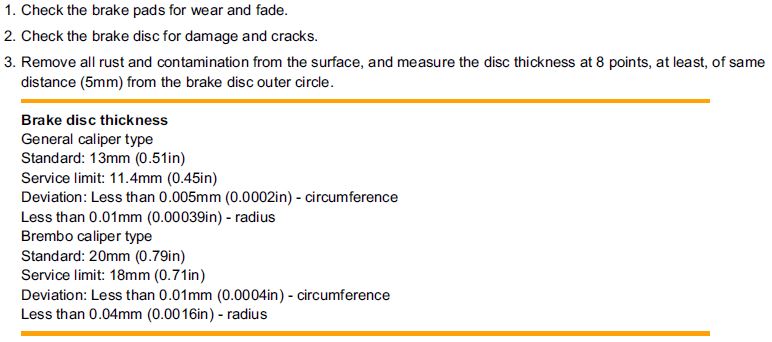
If wear exceeds the limit, replace the discs and pad assembly left and right of the vehicle. Never just replace one rotor or set of brake pads, at the minimum, do the other side.


